In this post I’m going to show you how to achieve massive savings for data backup. With a small amount of setup effort (and scripting), you can get tons of storage space, to use as an off-site backup, for a very very reasonable price.
Having built my own NAS (Network Attached Storage) device a couple of years ago, and storing more and more files on it (along with tons of media), it’s never been a better time to ensure that important files (documents, photos, music, videos etc) are backed up offsite.
Time to build an Odroid H2+ NAS#odroid pic.twitter.com/Fzd3C6fMbp
— Ryan Southgate (@ryan_southgate) February 22, 2021
I have an 8TB HDD in the NAS, so without a backup I’d be living on borrowed time, if the drive failed - I’d lose everything. I plan to add another identical drive in the near future and configure the NAS with 2 drives in RAID 1 (mirror). This only keeps me safe from the failure of a single drive. Remember RAID is not a backup and it’s imperative to have an offsite backup in case of fire/flood or some other destructive event which could destory my NAS and both of the drives.
156GB for 15 cents?! How?
Currently I’m using rclone to backup all files on my NAS to AWS S3 Glacier.
AWS S3 Glacier is for long-term data archiving, which for my offsite backup, is perfect. I chose the S3 Glacier Deep Archive tier, which is the lowest cost and is designed for users who need to access their data 1 or 2 times a year - and don’t mind waiting 12 hours for it to restore.
AWS S3 doesn’t charge for data transfer in (when you upload data to S3). It does however charge for data transfer out (when you download data from S3) - at the time of publishing this post, cost per GB is $0.09. So for me, if the worst did happen and I lost both drives in the NAS, it’d cost $14.04 to retrieve everything - quite reasonable in my opinion.
This is an offsite backup for me, if the worst does happen and my NAS loses all it’s data (flood/fire/explodes) - leaving all my local data destroyed, having to wait 12 hours to get the data back is not a problem. It’d take longer to order parts and rebuild a NAS. Having the data safe, with storage being cheap, is more important to me than being able to access it immediately.
Here’s my latest AWS Bill for September 2023
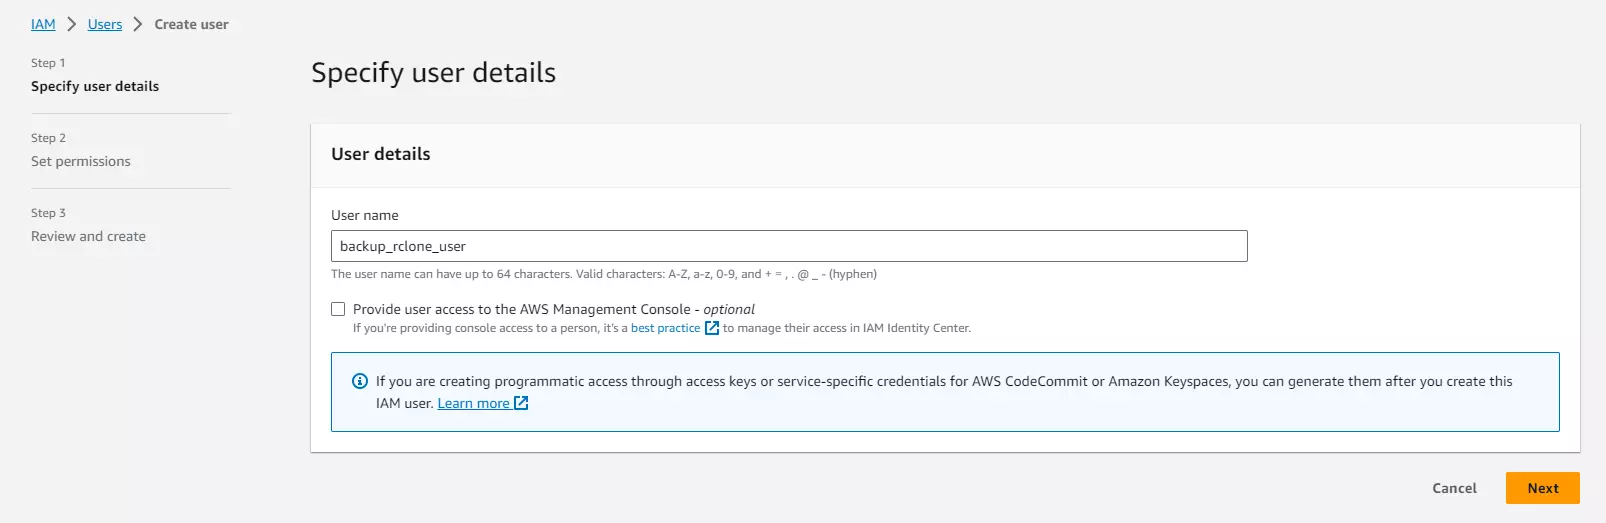
First things first - Creating an AWS IAM User
In your AWS account, create a new User and give it a good name:
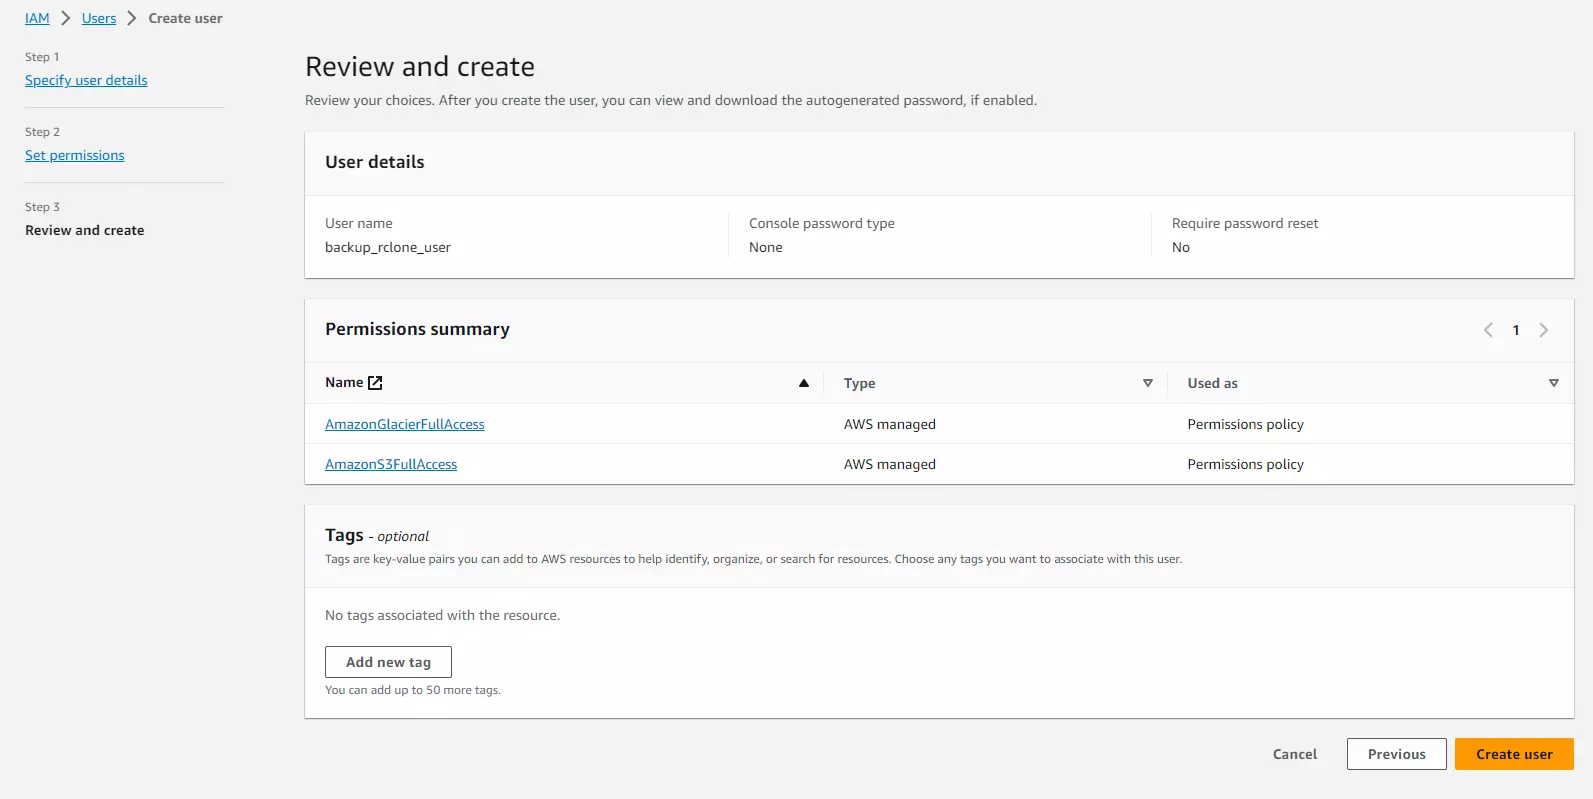
On the next screen, search for and give the user the following 2 permissions:
- AmazonGlacierFullAccess
- AmazonS3FullAccess
If you’ve got other S3 storage buckets, then you might want to restrict the above user so that they can only access certain buckets - to minimise potential damage in case of misconfiguration or your keys getting leaked
Then click next. The review screen should look like this:
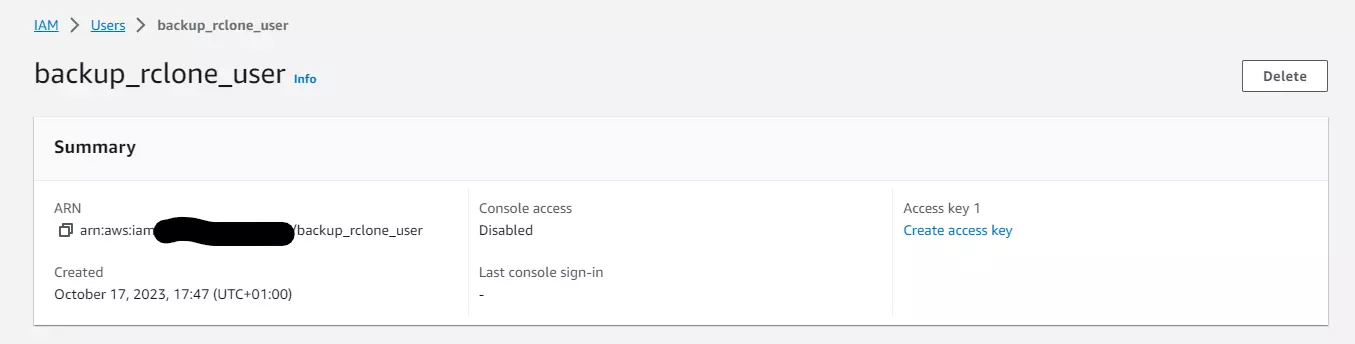
Then click “Create User”. Back on the User Screen, in the list of users, click your newly created user, then click “Create Access Key”
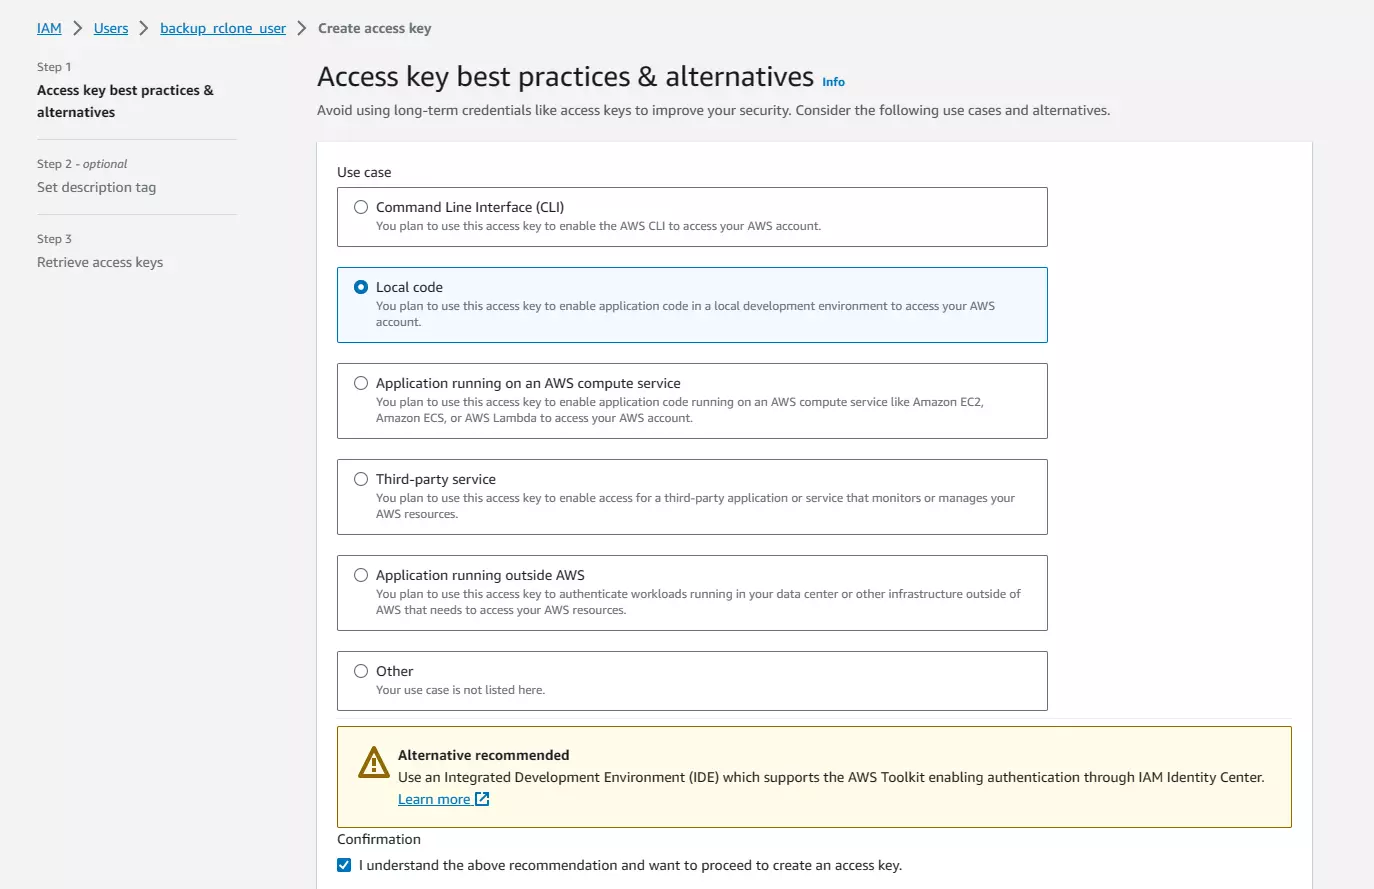
On the page below, select “Local Code” as we’re wanting to create an access key that rclone can use to access our S3 bucket. Then click “Next”
On the next screen, optionally set a description tag value (I don’t bother with this). And then click “Create Access Key”.
On the completion screen below, click “Show” under the “Secret access key” column on the Access Key table.
It should look something like below:
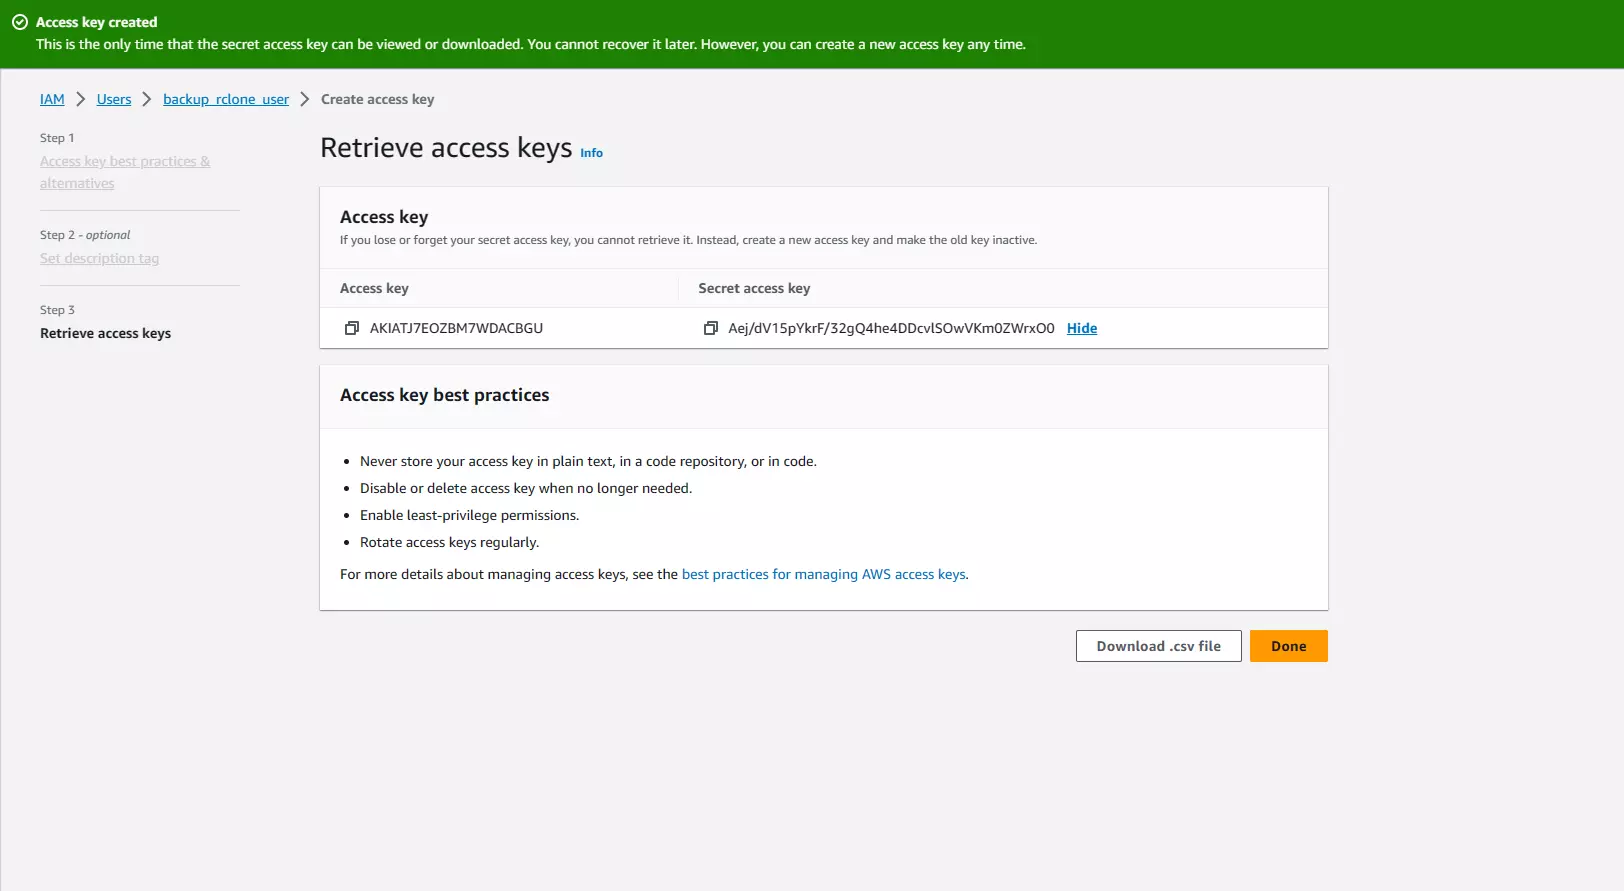
Make sure to copy both the Access Key and Secret Access Key and keep them safe (a password manager would be a great idea). DO NOT SHARE THESE WITH ANYONE, doing so will give them access to your S3 bucket along with everything inside it. (Don’t worry, by the time this blog post is live, this IAM user will have been deleted)
rclone in Docker
I’m using rclone in a docker container, the official container can be found here: https://hub.docker.com/r/rclone/rclone
The installation page has a number of different ways to install. I love docker so here’s a link to the docker installation section: https://rclone.org/install/#docker
Grab the docker image like so:
docker pull rclone/rclone:latestYou can configure any “remote/provider” you like. However, I opted to configure AWS S3 Glacier. You’ll need an AWS Account if you wish to use S3 Glacier. There are a few steps we need to take first, to generate an AWS “IAM User” for rclone, in order to for rclone to save files to S3 Glacier.
The rclone setup
Now our AWS user is created and we’ve got our keys, run the following command to be walked through creating the rclone config file. You need to specify a volume for Docker, so the container can save the config file.
docker run --volume $(pwd):/config/rclone -it rclone/rclone configAfter that process, in your current folder, you should have a new file called rclone.conf. Mine, after being configured for AWS S3 Glacier (Deep Archvive - the cheapest), looks something like the following
[aws-glacier-da]
type = s3
provider = AWS
acl = private
storage_class = DEEP_ARCHIVE
access_key_id = **the_secret_access_key_id_from_aws**
secret_access_key = **the_secret_access_key_from_aws**
Run rclone to backup a folder
The directory of my data on my NAS is on the HDD mounted to the filesystem at: /dev/sda1/Backup/Photos
To run the rclone command for the backup, first cd to the directory where our rclone.conf file is.
When running the backup command on the CLI, we need to mount that volume in Docker and let rclone access that directory. The backup command, in its entirety (and commented), looks like this:
docker run \
    --volume $(pwd):/config/rclone \ # mount the directory containing the config file
    --volume /dev/sda1/Backup/Photos/:/data \ # mount the directory where your data is
    -it rclone/rclone \ # run in interactive mode, the container "rclone"
    sync /data/ \ # the "sync" command (others do exist, so make sure you check the docs and choose the right one for you) will only upload files that are new/have changed since the last run
    aws-glacier-da:Photos-Backup -P -v # use the config block "aws-glacier-da" from our rclone.conf file. Right hand side of the colon is the bucket name (in AWS), -P = show progress, -v = verbose logging to see what's going on
Another command line option I like to use is --dry-run. This will simulate the command, but wont actually upload anything. I always run this first, before uploading any files to a new remote to see what it thinks should be transferred and to double-check I’ve got my config/command correct before spending (a small amount of) money.
Once happy, run the command. Depending on how much you’re uploading and the speed of your internet connection, it might take a while.
After it’s finished, enjoy the fact your files are safe and backed up offsite.
You can view them in the S3 Console, just click your bucket name (which you specified in the docker run command) and click it to explore the directories/files that have been uploaded.
A cronjob
Files can get added/updated/deleted. So it’d be nice to not have to worry about remembering to run this command every hour/day/week/month.
You need to have a good think about what backup frequency makes sense for your files. For me, a weekly backup suffices. So let’s write a cronjob which will run the rclone backup command once a week.
Create a file in the folder where your rclone.conf is, I’ve called mine perform-backup.sh. Copy and paste your docker command to the text file and save it, being a script file, it should look something like this:
#! /bin/bash

echo "Starting Backup"

docker run \
    --volume $(pwd):/config/rclone \
    --volume /dev/sda1/Backup/Photos/:/data \
    -it rclone/rclone \
    sync /data/ \
    aws-glacier-da:Photos-Backup -P -v

echo "Finished Backup"
Make the file executable by doing:
sudo chmod +x perform-backup.shNow (with crontab installed), do:
crontab -eto edit your crontab, then enter
0 5 * * sun /path/to/perform-backup.shwhich means “At 5am on Sunday”. I use the fantastic crontab guru when I need help editing crontab expressions
Save this and now your backup job will be run every 5am on a Sunday.
Want to get more advanced?
rclone is incredibly powerful, and there are lots more things that can be accomplished. I’d heavily suggest reading through their documentation to ensure you’re getting the most out of this awesome piece of software.
Why not GoogleDrive/OneDrive?
I have used and nearly filled both the free tiers of OneDrive (which came with an email address) and Google Drive (15GB, which also came with an email address/android phone). These two services (combined) are not enough for all the important files I have.
I could pay for increased storage. However, as of now I’d need the Google Drive 200GB tier, which is £2.49/month. It isn’t a bad price, once you consider the deep integration on Android phones and the ability to share drives with others and a few other features that I’m really not sold on (Google VPN, “Google Photos editing features” and “Extra Member benefits”). My data needs are constantly growing, in another year’s time, I might have over 200GB of data to store, which would pop me in the next bracket…. 2TB for £8.99/month - which is where things start getting more expensive - and not worth the cost for me.
I’ve got tons of photos & videos from old digital cameras (remember those?!) that were living on various USB Hard Drives, laptops and tower PCs. A couple of years ago, I decided to organise and consolidate all these files and put them all in one place. Moving these to my Google Drive is a waste of space and money. I want to keep them, but don’t necessarily need them on my Google Photos app - I just want to know they’re safe and there if I ever need to open them - they’re happy sitting on my NAS.
Accessing the files out of my home network
I use a WireGuard VPN on my Android Phone 24/7 - it’s always connected, ensuring that when I’m out of the house, I still have access to all my important files on the NAS and also still have adblocking (thank you PiHole!).
Over the past year or two of running the NAS, I’ve yet to have a problem connecting to it from home/VPN - it’s been rock solid.
Next Steps: A Private Cloud
I’m running out of space on my GoogleDrive and I’m eager to have all of my photos on my Android phone, automatically backed up to my NAS. I think NextCloud might be the answer to my prayers. I’m going to be playing around with this soon to see if it fits my needs and integrates nicely with the off-site backup solution I’ve created above.
Conclusion
Storage can be had for very small fees - you just need to know where to look, embrace the CLI and choose what’s right for your needs.
If you’ve got any feedback, improvements or information on how your setup works I’d love to hear it. Get in touch in the comments or get me on Twitter/X
Thanks for reading!