At work recently, I’ve come to notice how much people use the toilet…..
Bear with me on this one!
We’re currently under a bit of a change at work – we’ve lost a section of our building mostly used for meeting rooms. We’ve also lost a number of toilets.
Now in our “reduced space” we’ve got less toilets for the same amount of people.
This means that getting up to go to the toilet is a bit more of a gamble, you might get up, find one free and feel relieved. Or, you might get up, go on a walk up and down various set of stairs and come back to your desk feeling worse – and knowing that you’ll have to get up in another couple of minutes to “roll the dice” once more.
I have a Raspberry Pi 1 (v1 – Model B) at home, sitting there gathering dust under the TV. It was once used as a bit of a toy – I had installed RetroPie on it and used it play old Sega Mega drive games – I’d would lose many hours over a weekend!
Recently, its not seen much use (I’m spending large amounts of my spare time on some web projects I’m working on with friends).
It sat there staring at me and then it clicked – Raspberry Pi – Door sensor.
I could create a small program/script which monitored the open/closed state of door(s), then serve a simplistic html page displaying their states!
Side note: each toilet at our office is a single room, with its own locking door. People usually leave the door open when they’re done.
People at work could log on to our intranet page to check if it’s worth making the trip to the loo.
A quick google search showed “Door Sensors” to be pretty cheap (£1.99 delivered from eBay), they look like this: (they are actually called “Reed Switches” which are magnet driven switches – with plastic which screws into a door)
Getting it working
If you’re a first-timer to Raspberry Pi and haven’t actually set one up yet, you can buy the “NOOBS” SD card (contains the operating system) or (if you’re cheap or have an SD card lying round – like I did) you can put the Raspberry Pi OS on a SD card of your choice.
I’m not going to re-hash a guide to doing that, there are plenty of good ones on the web
Hooking up the Sensor
The door sensor has two wires – connect 1 wire (doesn’t matter which) to a free pin (I chose PIN 8 – you need to refer to this PIN in the code explicitly) and the other to one of the ground (GND) Pins (pin diagram here).
Start up the Raspberry Pi and go to the desktop (type: “startx”).
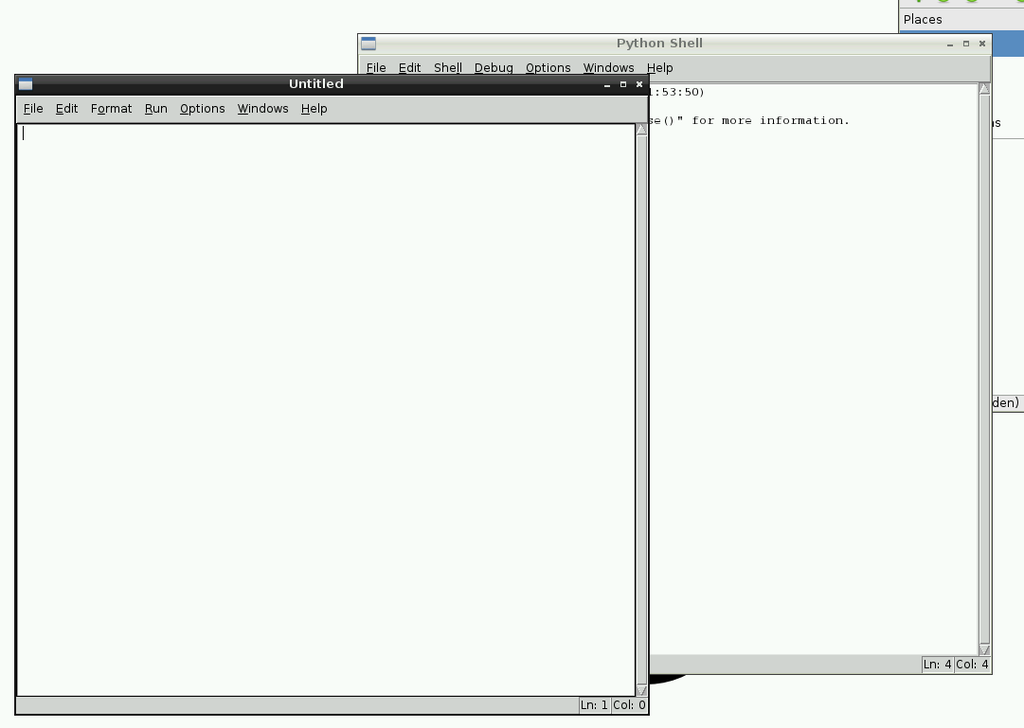
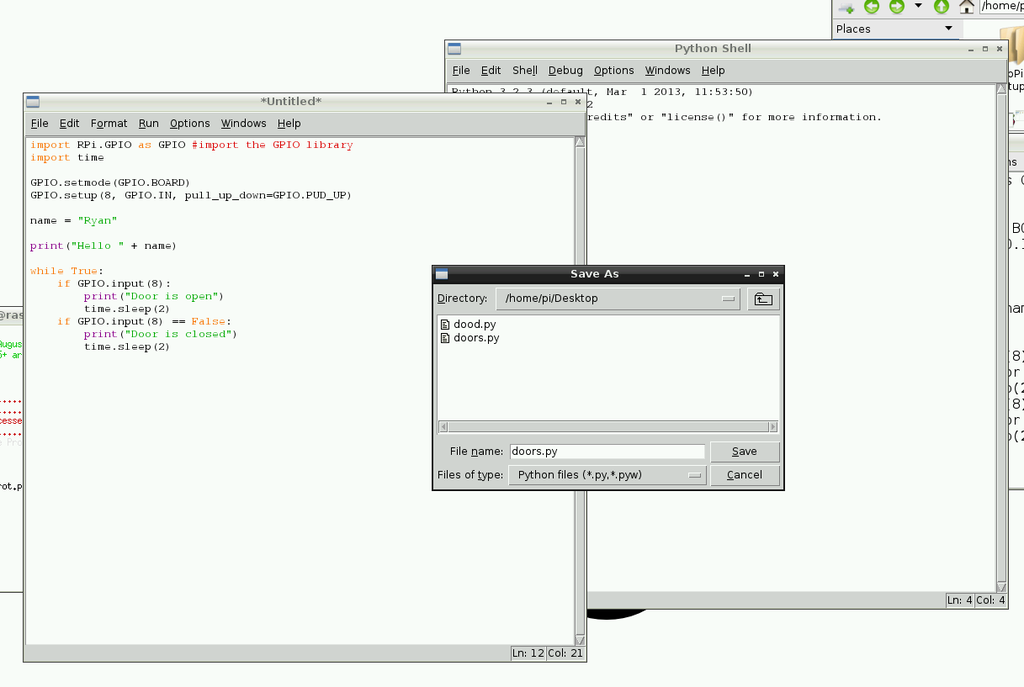
Once we’re on the desktop, open Python3 (IDLE) – this is what we’ll use to start writing code. It will open the “Python Shell” screen, click File>New to get the code window (focused below)
Now for the code…
import RPi.GPIO as GPIO #import the GPIO library
import time

GPIO.setmode(GPIO.BOARD)
GPIO.setup(8, GPIO.IN, pull_up_down=GPIO.PUD_UP)

name = "Ryan"
print("Hello " + name)

while True:
    if GPIO.input(8):
       print("Door is open")
       time.sleep(2)
    if GPIO.input(8) == False:
       print("Door is closed")
       time.sleep(2)
The first 2 lines add the Raspberry Pi GPIO (pins on the board) and the “time” library which we’ll use for sleeping.
Line 3 sets up the board.
Line 4 sets up Pin 8 (as an input, using Pull Up – resistor – detailed information here)
The name print is just a sanity check to ensure the program is running.
Line 11: we start the “infinite” while loop – basically just keep checking the sensor until the program is interrupted, OS crashes or the world ends.
We then check the state of the sensor using
if GPIO.input(8):
(obviously in your program – use IF – ELSE, I’ve just used 2 IFs to demonstrate the checking). I’m using sleep here to only check the Pins every 2 seconds – this is just to stop the Terminal filling up and getting messy when we test.
Once we have the program written you can try pressing F5, or clicking Run>Run Module (which will prompt you to save the file).
but………………………………….
F5/Run Module wont run your code!
you’ll get an error that looks like this:
RPi.GPIO.SetupException: No access to /dev/mem. Try running as root
The Raspberry Pi needs root access to use the GPIO pins, when we opened IDLE we ran it under the current user.
Opening IDLE with root access isn’t a good idea in terms of security, if you’re just using this to debug then that “should” be fine – but, it’s your Pi – do as you wish 😉
Instead open a terminal, navigate (cd) to where you saved the file and do (replacing doors.py with your script filename)
sudo python doors.py
This will begin running the script.
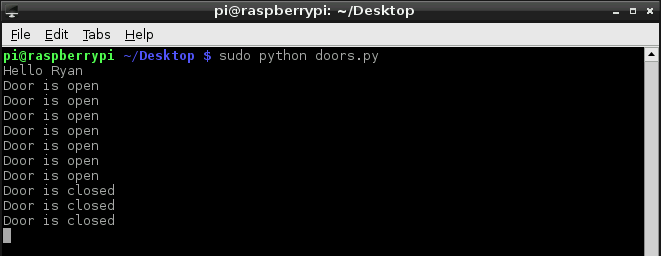
If all is successful you should see this (whilst pushing and pulling the door sensors closer/away from each other).
If you’ve got an comments/suggestions/improvements let me know in the comments or on twitter.
Obviously we’ve only covered one small part of the “master plan” for streamlining toilet visits.
I will be tackling running a web server in the coming posts, then hopefully a final instalment to unite the two and have a complete solution.
comments powered by Disqus

